News & Events
Operation of Manual-Multifunctional Flooring Cutter
Read and understand this instruction manual before operating the multi-flooring cutters.
1. Stay alert. Do not operate while under the influence of drugs, alcohol, or medication.
2. Always wear safety approved eye protection with side shields.
3. Keep work area free of debris.
4. Keep children and unauthorized persons away from the Multi-flooring Cutter and work area.
5. Make sure tool is secure. Operate only on a firm substrate or solid stand.
6. Use the right tool. Do not force the Multi-flooring Cutter or use it for a job for which it was not designed; use only on approved materials.
7. Keep the blade sharp. A dull blade will not perform properly.
8. Always keep hands away from blade while operating or carrying the cutter.
9. Do not alter or misuse this tool. The Multi-flooring Cutter is precision built; modification not specified in this manual may result in a dangerous and unsafe environment.
10. Maintain the Multi-flooring Cutter with care. Keep blade sharp and clean. Follow instructions for changing accessories.
11. Use only recommended accessories. The use of improper accessories may be hazardous and cause injuries.
12. Never leave the Multi-flooring Cutter unattended. Secure the handle with the lock chain when not in use.
Set Up
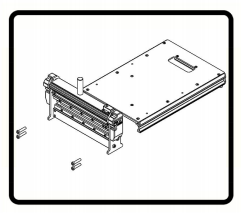
1. Installation of the cutter
(1)Install the table to the cutter base with provided screws and bolts as shown.
Warning: Do not put your fingers against the sharp edge of the blade at any time.
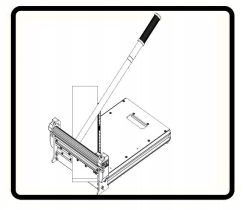
2. Installation of the cutter
(2)Fix the handle with the screws and wrench provided.
Warning: Do not put your fingers against the sharp edge of the blade at any time.
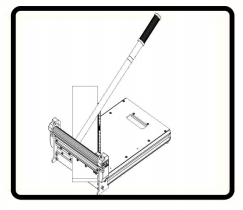
3. Cutting Preparation
(1) Adjust the angle attachment to desired angle as needed.
(2) The angle attachment can be used on left side of the tables as shown.
Warning: Do not put your fingers against the sharp edge of the blade at any time.
Cutting
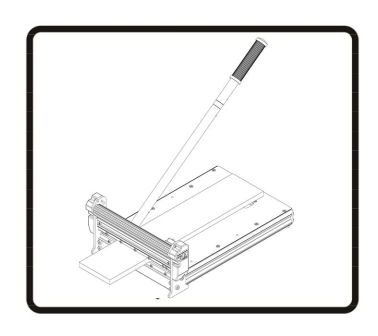
1. Straight Cutting
(1) Insert material between the cutting blade and the base, flush with the angle attachment as shown and hold the material with foot then push handle down to complete a cut.
(2) Blade cutting maximum width: 240mm
(3) Blade cutting maximum depth: 10mm
Warning: Maintain control of the handle. Do not allow handle to slam back after making a cut.
2. 45° Cutting
(1) Swing the angle attachment to 45°. Insert material between the cutting blade and the base, against the angle attachment as shown, then push handle down to complete a cut.
(2) Blade cutting maximum width is 169mm when angle cut 45°.
Warning: Maintain control of the handle. Do not allow handle to slam back after making a cut.
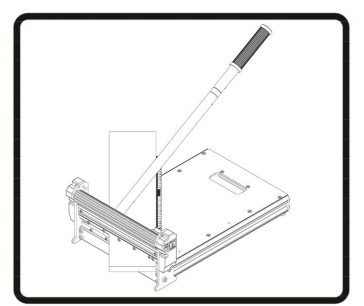
Maintenance
1. Changing the blade
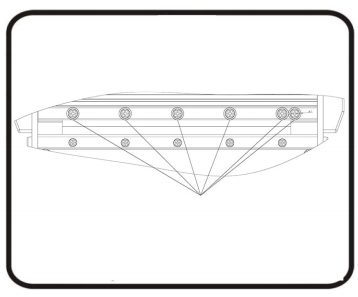
Use the provided wrench to remove the five screws, then hold the blade by each end and carefully move the blade out of blade holder.
Note: the flat side of the blade facing the table.
Warning: Do not put your fingers against the sharp edge of the blade.
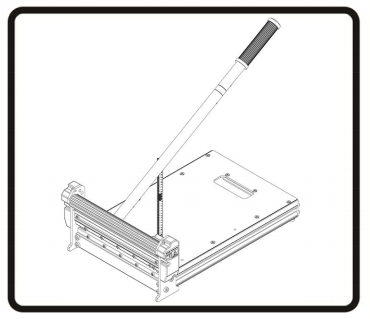
2. Carry
Close the latch on the cutter head and carry the cutter as shown.


.png?v=20250420)


 Richard Liu
 +86.519.8585.1798 Fax:+86.519.8585.6878
 info@xinflooring.com ( 7*24 hours online)
 Science & Technology, Industrial Park, Hutang Town, Wujin District, Changzhou City, Jiangsu Province, 213162, China.